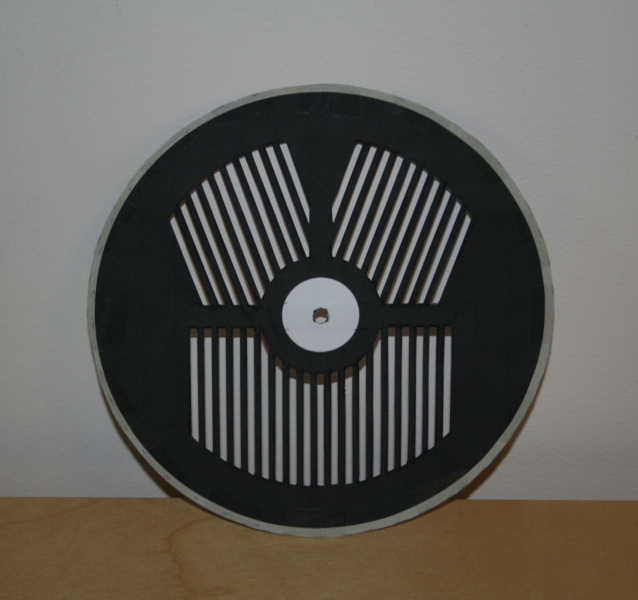
| Bahtinov Mask |
This device is used to improve focussing. It is always difficult to see a star image clearly in the camera viewfinder. If you take an out of focus picture there is no way to tell which way you need to adjust the focusser, so it is largely a matter of trial and error.
The Bahtinov mask is intended to solve this problem.
A Russian astronomer Pavel Bahtinov invented the device. If you can read Russian have a look here.
 |
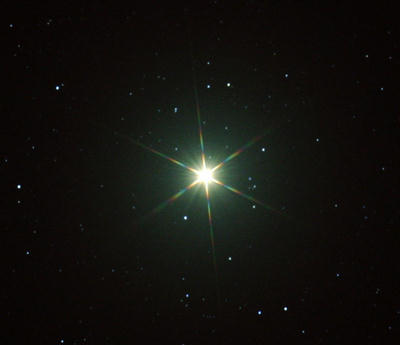
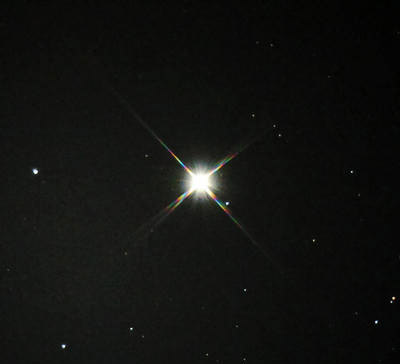
The
Bahtinov mask placed over the telescope aperture will introduce diffraction
spikes around bright stars. The central spike is displaced to one side or the other when out of focus. The key point is that the direction of displacement willl indicate which way to adjust the focus. |
 |
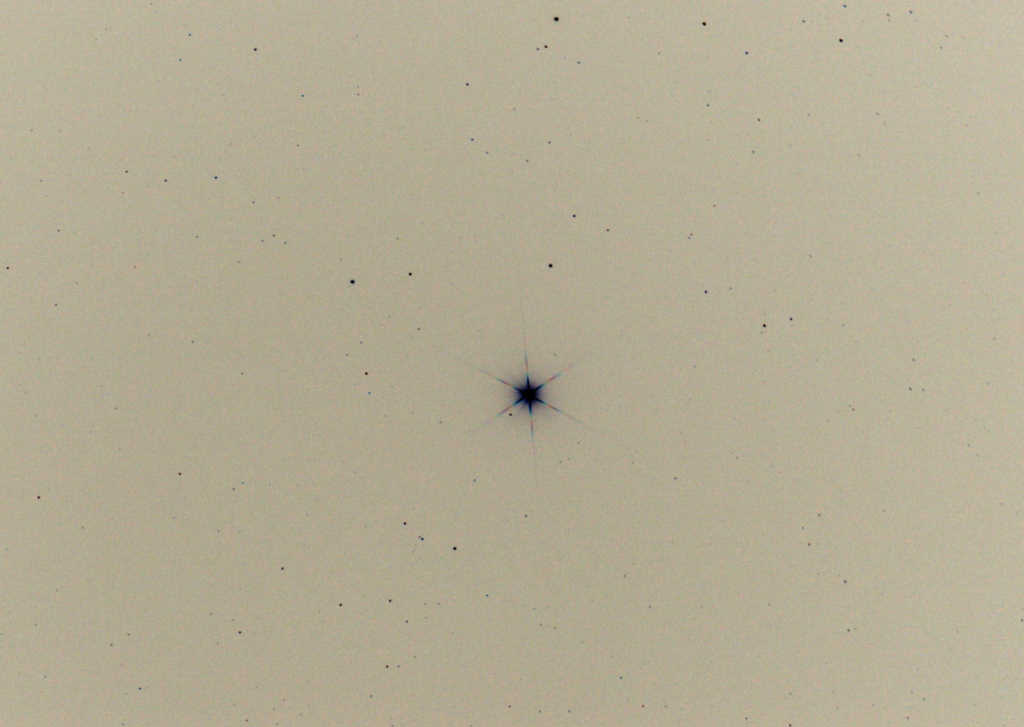
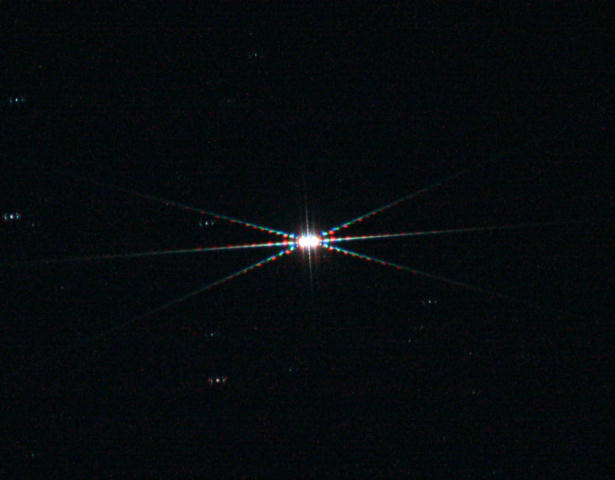
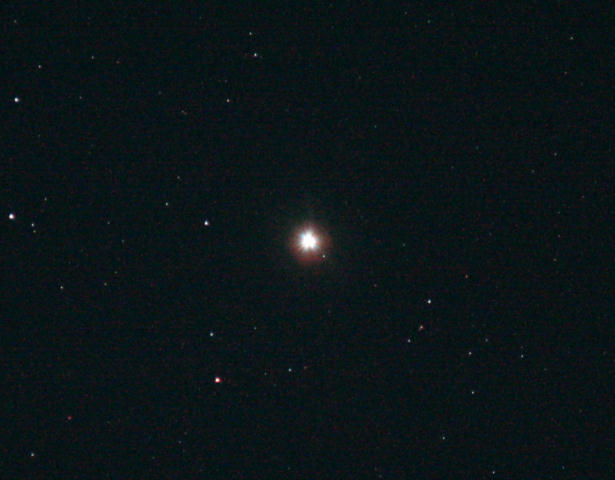
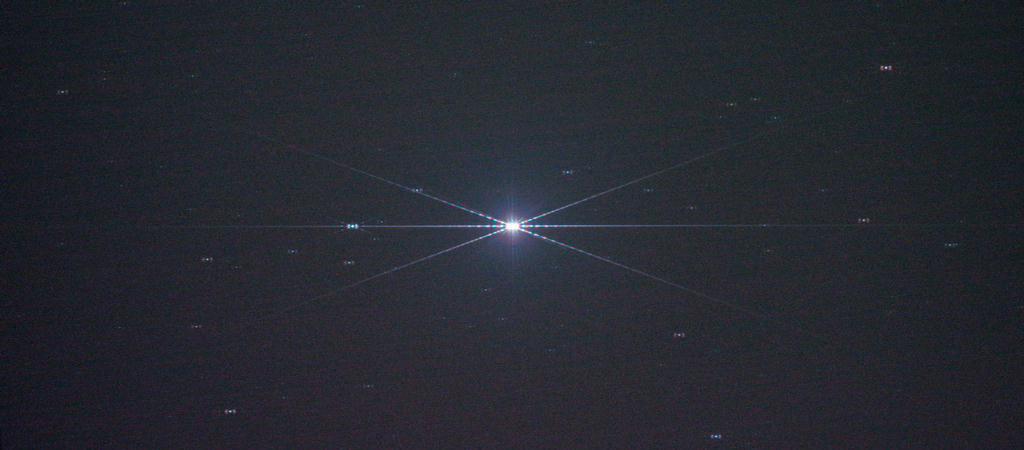
There was a brief clear spell tonight (17/12/08) and I tried the mask out on Capella. The diffraction spikes are very long and thin and seem to be very sensitive to adjustments of the focuser. These were 7 second exposures - the right hand image is a 10 second exposure without the mask.

This negative image shows that good focus was achieved.
Conclusion: The Bahtinov mask seems to be a very good focussing aid. It is no longer necessary to remove the memory card from the camera and traipse indoors to the computer to check the focus, as the diffraction spikes show up well on the camera's LCD screen. The prototype is made of paper and is very flimsy. A sturdier mask will need to be made.
| Here is a short YouTube video showing the movement of the central spike. |  |
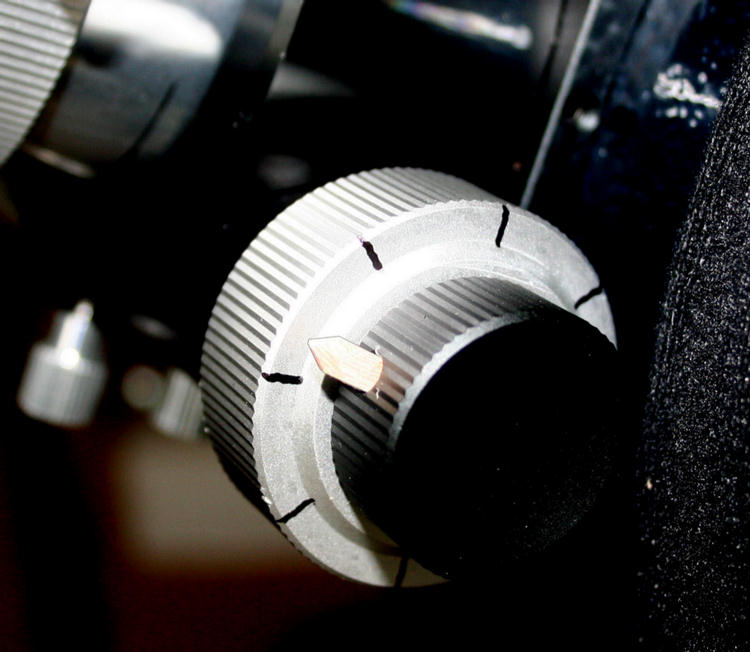
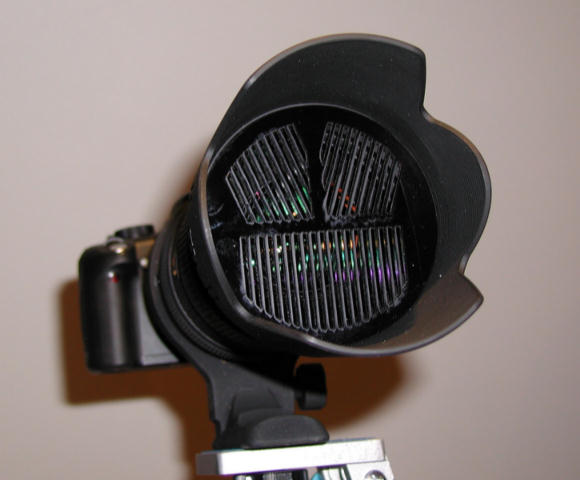
The mask in situ.
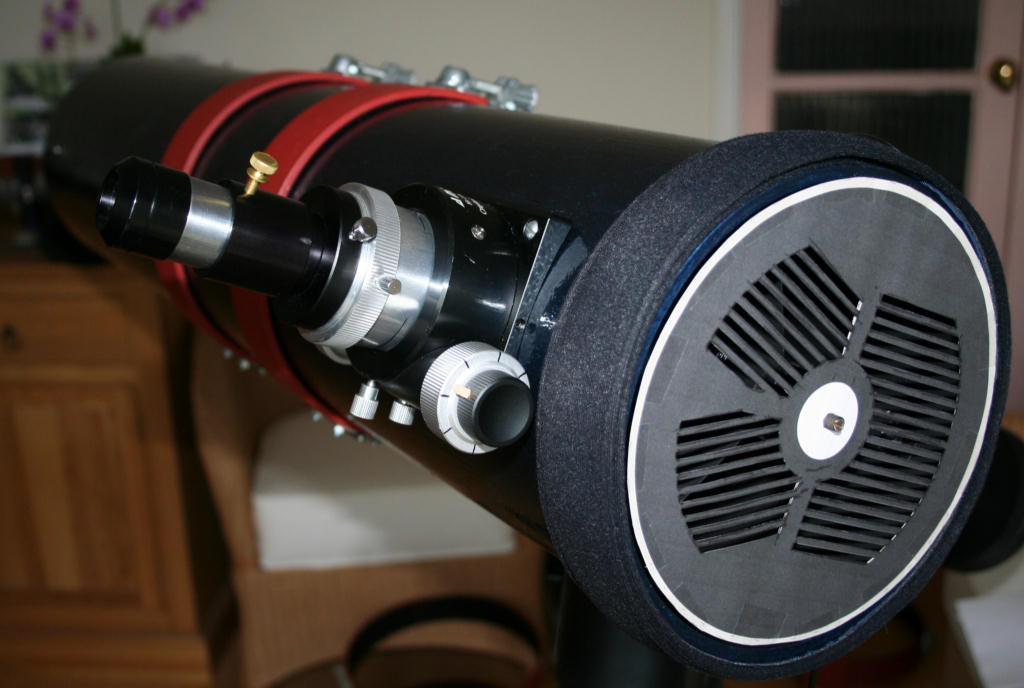
To keep track of the focuser position I have made a small wood pointer and scribed 8 lines on the focuser.
Moving the pointer from one line to the next alters the focus by 0.18mm
How does a Bahtinov Mask work?
Any obstruction to the light path in the reflecting telescope will produce diffraction effects. The effects produced by the vanes that support the secondary mirror are seen around bright stars as diffraction spikes.
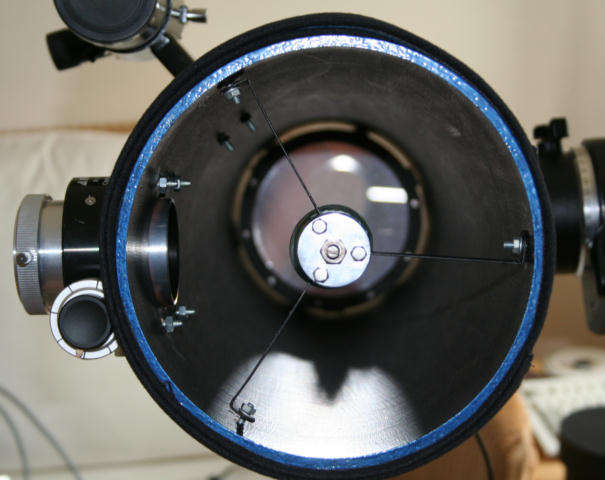
My 6" reflector has 3 vanes and produces 6 spikes.
 |
 |
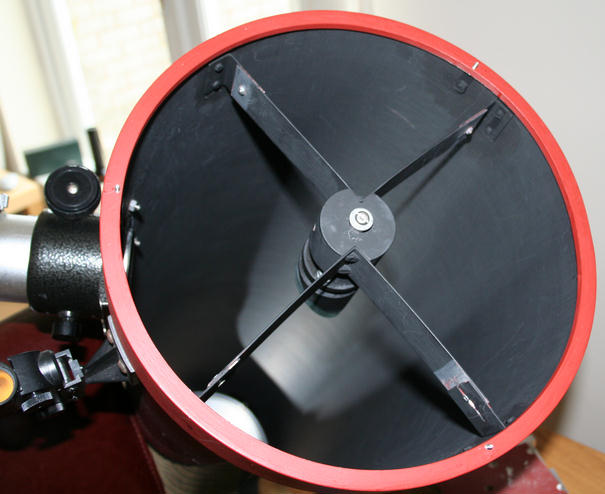
The 10" has 4 vanes and produces 4 spikes
 |
 |
Each vane produces a spike which cuts across the star image. This explains why 3 vanes appear to produce 6 spikes.
The 4 vane support appears to have 4 spikes, but in reality there are 8. When perfectly focussed, pairs of spikes should overlap. My 10" vanes are not quite straight, hence the splitting of some of the spikes. (Getting the vanes straight and at 90 degrees to each other is a future project!)
A hypothetical single vane support would produce this effect.
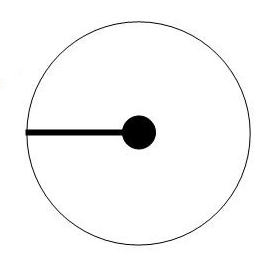 |
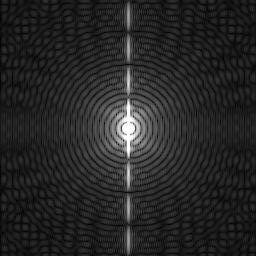 |
This simulation was produced from an excellent tutorial on Fourier Transforms |
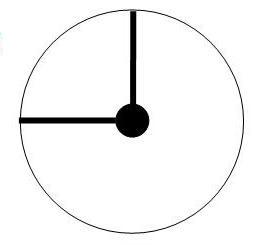
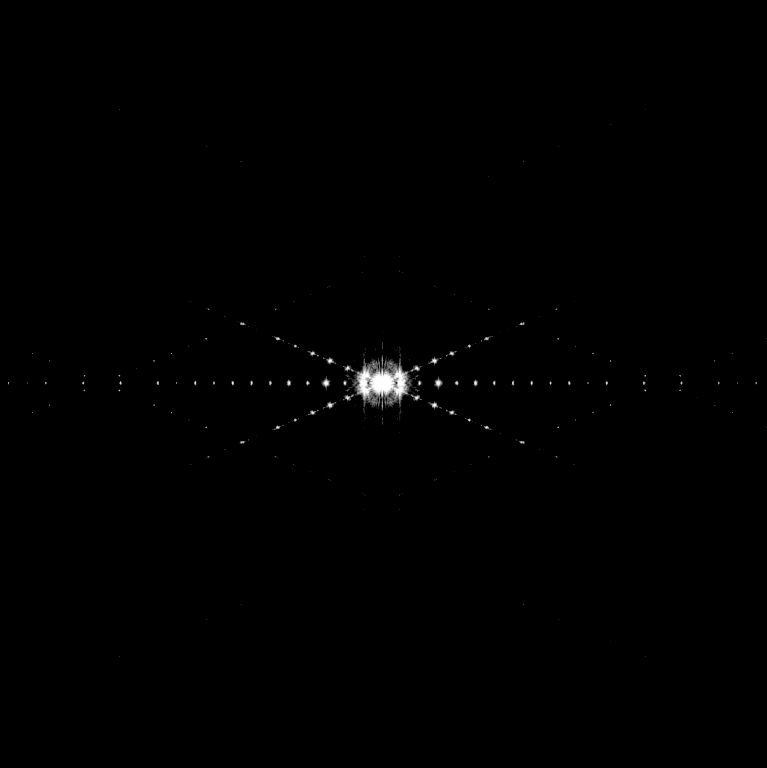
A 2 vane support at 90 degrees would produce this.
 |
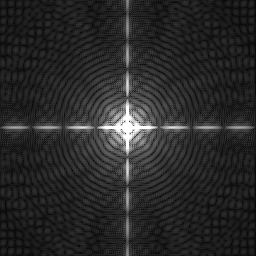 |
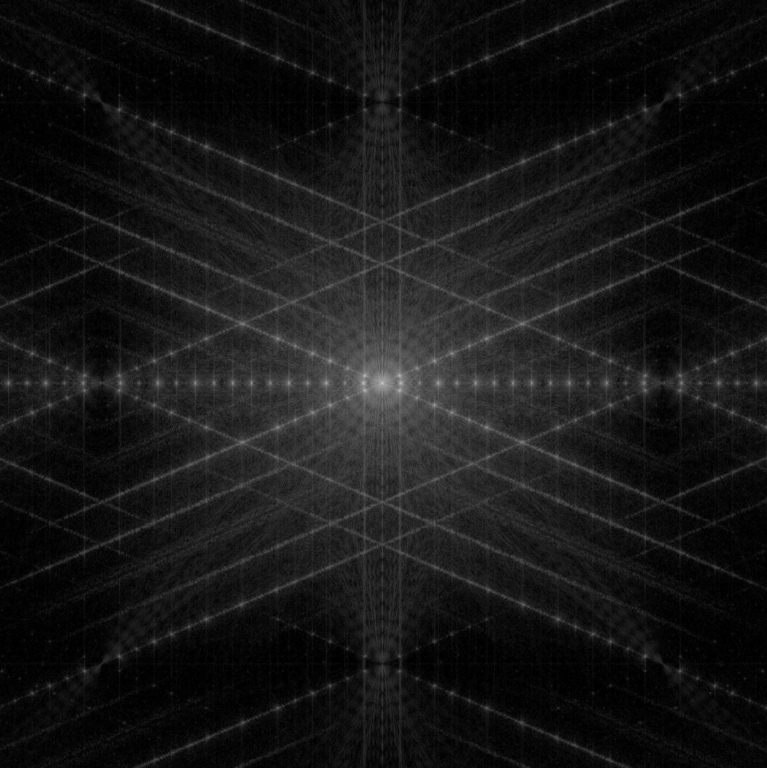
A 3 vane support
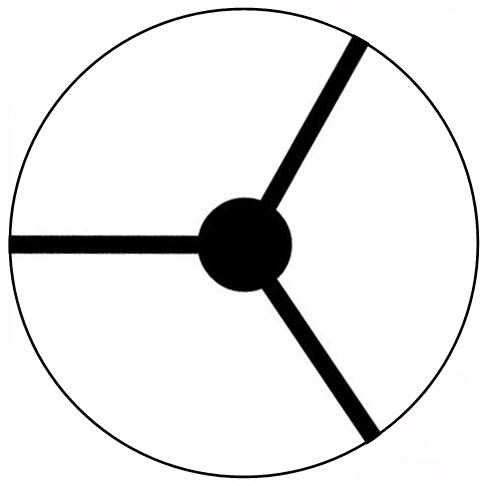 |
 |
When the focus tube is racked up or down to get good focus, the diffraction spikes are seen to sweep across the central star image. (Why this happens I have not yet been able to pin down. If anyone knows the answer, please tell me!)
***********
Update 5th March 2009 - I think I have finally figured it out! See further down the page...
***********
| This can be seen in this animated GIF |  |
The direction that the spikes sweep is crucial to understanding how the Bahtinov mask works.
| This diagram shows how the spikes move.
Pretend that the blue blob is a star. Note that with 2 vanes opposite each other, each vane produces its own spike, and the spikes move in opposite directions. This gives the appearance of the spikes splitting, but in reality they are separate entities. When focus is perfect they overlap and look like one spike. |
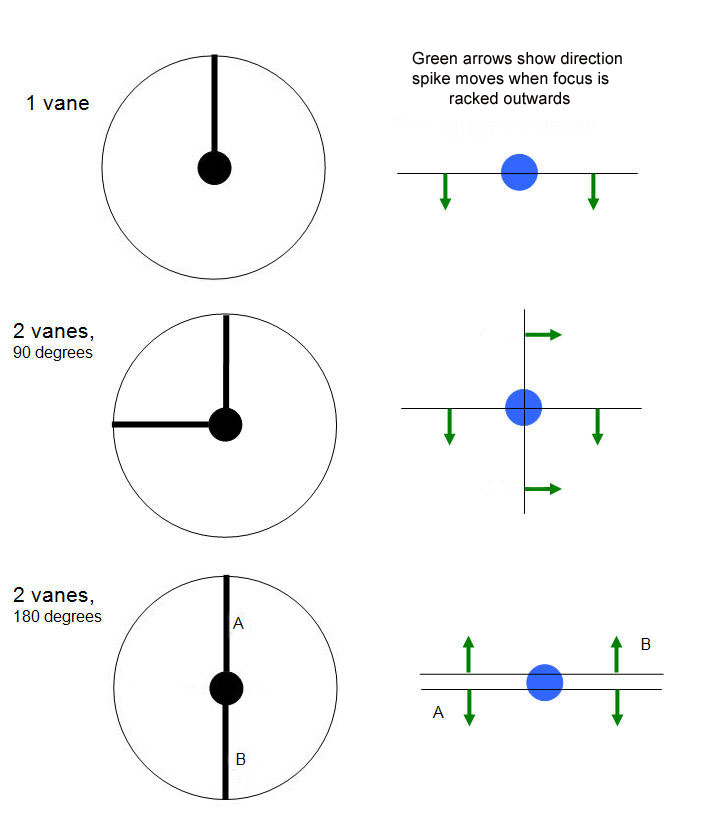 |
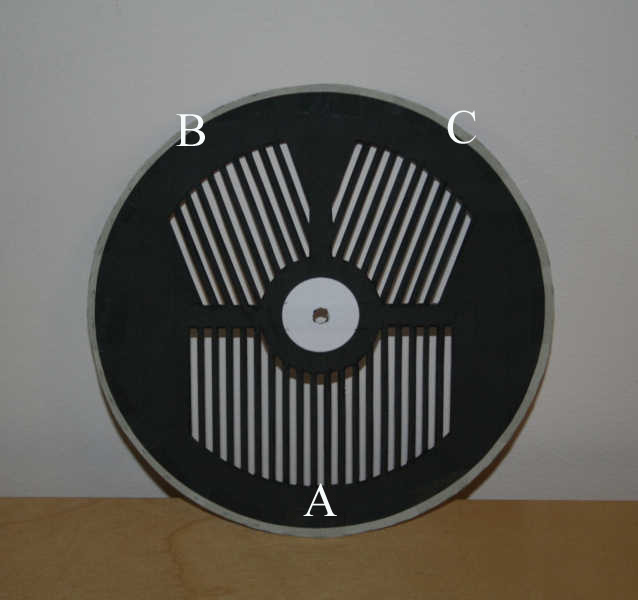
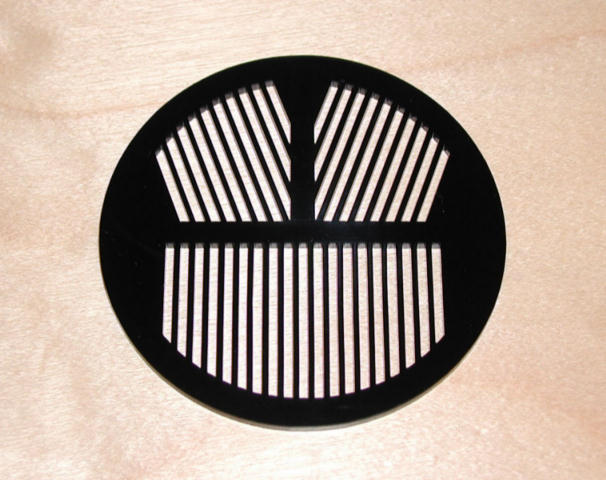
| The Bahtinov mask is made up of three sets
of bars, A, B and C. Each set of bars will create a diffraction spike. (Each individual bar makes its own spike, but fortunately they all land in the same place.) The more bars, the brighter the resulting spike. |
 |
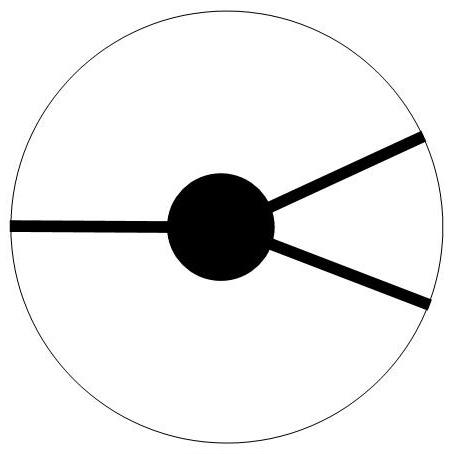
| The apparently complicated pattern of the
mask can now be reduced to the equivalent of a simple 3 vane
support. The key to understanding how the Bahtinov mask works is to see which way the spikes move when the focus is changed. The angled bars (B and C) produce the angled spikes, and they will move to the left when the focus is racked inwards. The vertical bars (A) produce the central spike, and this will move to the right. Perfect focus is then easy to identify because the central spike should bisect the two angled spikes. The human eye is very good at judging when an angle is exactly bisected. |
 |
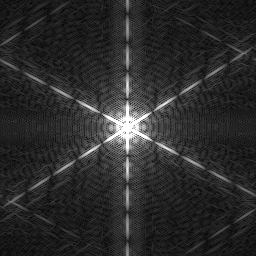
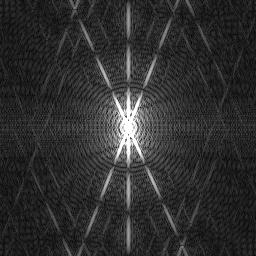
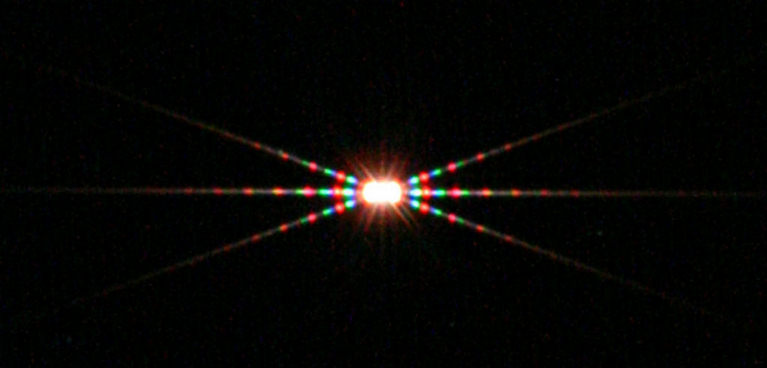
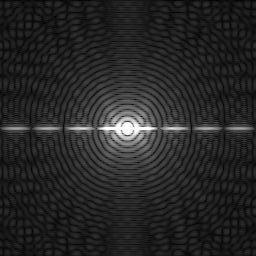
This is the diffraction pattern for a 'Y' shaped support. This is very similar
to what is observed with the Bahtinov mask.
 |
 |
.
| This animated GIF shows perfect focus
being reached in only three adjustments. (It is quite a large file so may take a while to download). |
|
| This is a mask for the Sigma
50-500mm telephoto lens. It was laser cut from 3mm perspex. |
 |
| The mask in
position. |
 |
| Results for telephoto lens -
the mask works well! The left hand image shows the central spike almost exactly
centred. The right hand image is with the mask removed. Stars are well focused. |
|
 |
 |
The mask for the 6 inch reflector, laser cut from 3mm perspex sheet.

20th February 2009
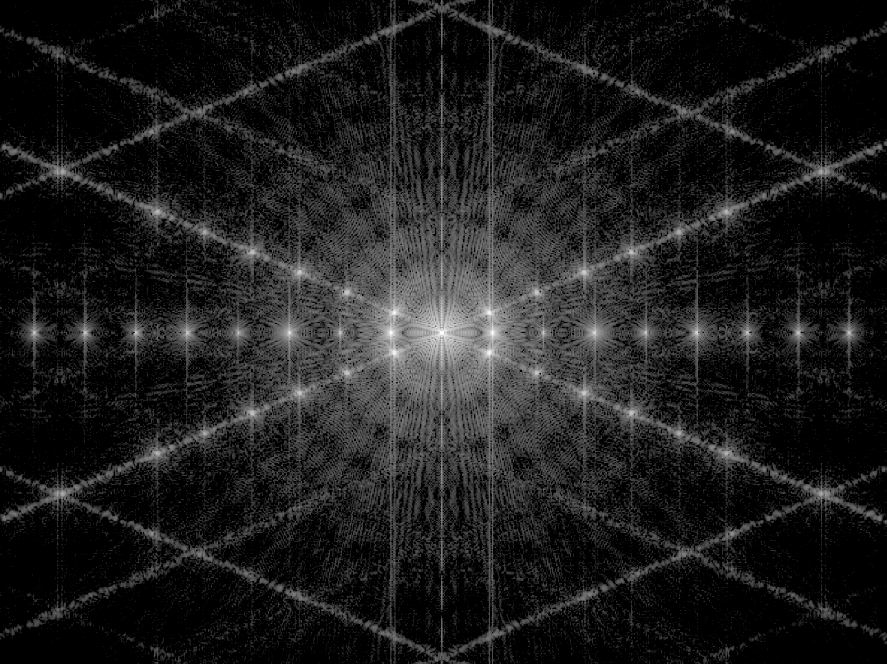
I was delighted to be contacted by Jeremy Waller from South Australia who has plotted a detailed diffraction pattern.
He works in Statistical Signal Processing and is skilled in using Fourier Transforms.
This is for a single wavelength of light, and assumes a perfectly made mask.
The diffraction pattern is complex, and would not be seen in reality as the intensity of most of the pattern
would be too dim to register on the camera CCD. However, if the contrast and brightness is adjusted to
simulate real life conditions, we have this:
This is now very similar to what is actually seen:
The central part of the pattern is worth seeing magnified:
Normally only 5 to 10 seconds is used to get an image good enough to focus with.
The image below is a 30 second exposure with enhanced brightness.
The spikes can be seen to cover almost the entire frame.
Why do the spikes sweep across the star image?
This was the hardest part to figure out, because there was a fundamental error in my understanding. I thought that when a diffraction spike was formed by a vane, it was formed parallel to the vane as in the diagram below.
|
 |
I could not see how this spike could sweep across the star, because symmetry seemed to indicate that whatever happened to the light on one side of the vane would be exactly mirrored on the other side.
I racked my brain for many weeks to visualise some process which would be asymmetrical. Eventually the light bulb went on.
Perhaps the diffraction spike is actually perpendicular to the vane?
|
|
Bahtinov mask pictures that I have taken confirm this fact! |
All is now clear!
Consider a hypothetical reflecting telescope with a single vane on the left as in the diagram above.
Light from a star arrives at the telescope as a plane wave, ie all the photons are travelling parallel to each other.
Imagine we are looking down the telescope. Photons that are 'disturbed' by the single vane all strike the left hand half of the mirror.
The mirror tries to focus all the photons to a single point on the image plane. If diffraction did not occur this would happen,
but diffraction caused by the vane produces a spike at 90 degrees to the vane.
Therefore the light that generates the spike all comes from the left hand half of the mirror.
The following diagram shows how light generating the spike crosses over at the focal point of the mirror.
The central star image is formed by light from the entire surface of the mirror so it stays centred. However, as you move the eyepiece or camera through the perfect focus position, the spike will be seen to sweep across the star.
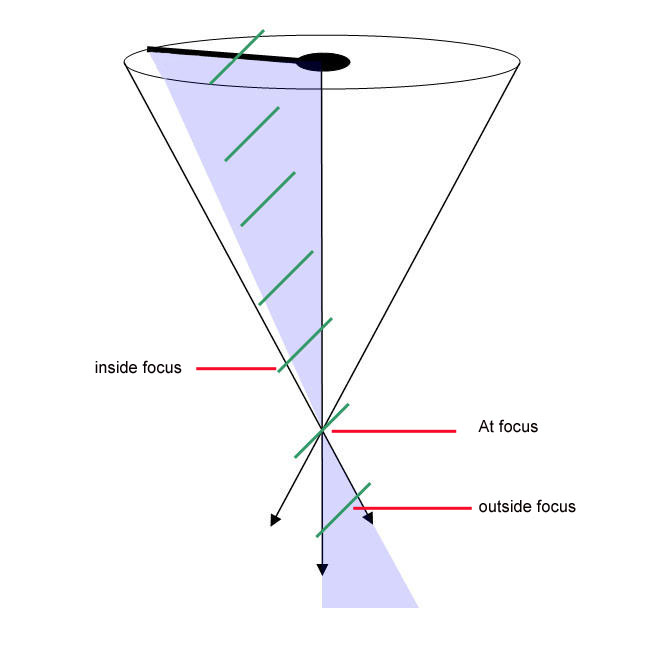 |
The green bars
represent light that generates the spike. The actual formation of the spikes is very complex - the important point is that the light crosses over at the focal point. Each group of slits in the Bahtinov mask generates a single spike in a similar way to the above explanation. |
Click here for more mask experiments